
What do you do when the pizza wedge doesn’t work to slow down?
If the pizza wedge isn’t working to slow you down, it almost always means the technique isn’t being executed correctly, or that your muscles simply aren’t strong enough yet to hold the wedge at higher speeds. The pizza wedge — also known as the snowplow or wedge stop — is the first braking technique beginners learn, but it demands more strength and control than it appears to at first glance. In this article, we answer the most frequently asked questions about braking with the pizza wedge, so you can head down the slope with greater confidence.
Why does braking with the pizza wedge sometimes fail?
Braking with the pizza wedge fails when the skis aren’t pushed inward enough, the knees stay too stiff, or the body leans backward. All of these mistakes cause the snowplow to lose its braking effect, and your speed continues to increase instead of decrease.
The most common cause is that beginners bring the tips of their skis together but don’t push the tails far enough apart. This means no real wedge is formed, and the technique has little effect. Fear also plays a major role: when people are scared, they instinctively shift their weight backward. This feels like a natural self-protective response, but it has exactly the opposite effect. Your weight ends up on the back of the skis, causing them to lose grip on the snow.
Another common mistake is that skiers don’t roll their knees inward enough. The inside edge of the ski needs to make contact with the snow to create friction. Without that tilt, the skis simply glide through and you barely slow down. Finally, fatigue and muscle strength play a role: the pizza wedge requires constant pressure from the inner thigh muscles and calves, which tires out quickly when you’re new to skiing.
How do you execute the pizza wedge correctly?
You execute the pizza wedge correctly by positioning your skis in a V-shape with the tips close together and the tails pushed wide apart. Then gently press your knees inward so the inside edges of the skis bite into the snow, and keep your weight centered over your feet, leaning slightly forward.
Step by step, the correct technique looks like this:
- Start on flat terrain. Practice the stance first without moving so you can feel what the position is like.
- Actively push the tails apart. Don’t think about squeezing the tips together — think about pushing the tails outward. This gives you more control over the width of the wedge.
- Roll your knees inward. Press your knees gently toward your big toes. This causes the inside edges of the skis to grip the snow.
- Keep your upper body relaxed and slightly forward. Hold your hands in front of you as if you’re carrying a tray. This helps your balance.
- Vary the pressure. The harder you push the tails apart and the more you roll your knees inward, the more you brake. Less pressure means more speed.
A good way to check whether you’re doing it right: look at the tracks you leave in the snow. Do you see two parallel lines? Then your skis aren’t in a wedge. Do you see a wide V with angled tracks? Then you’re on the right track.
What do you do if your speed keeps increasing despite the pizza wedge?
If your speed keeps increasing despite the pizza wedge, the best immediate action is to leave the slope by steering diagonally toward the side, or to fall deliberately in a safe spot. Never try to brake harder by throwing your weight backward — that makes the situation worse.
On steeper slopes, the pizza wedge quickly loses its effectiveness, simply because gravity is stronger than the friction the wedge can generate. In that case, there are a few things you can do:
- Steer diagonally toward the side of the slope. By riding at an angle rather than straight down, you reduce the effective gradient you’re descending and give yourself time to stop.
- Make turns. Even a simple arc to the left or right will reduce your speed. Combine this with the pizza wedge for extra braking power.
- Fall deliberately if necessary. This sounds scary, but a controlled fall on a soft, flat spot is always better than racing out of control. Sit down and let yourself fall sideways, away from other skiers.
What you should avoid at all costs: panicking and tensing up. The stiffer your body, the less control you have. Breathe consciously, bend slightly through the knees, and keep actively steering.
What exercises help you brake better on skis?
The best exercises for improving your braking on skis are deliberately varying the width of your wedge on a gentle slope, traversing and turning, and targeted strength exercises for the inner thighs. Repetition on quiet terrain builds both muscle strength and confidence.
On-slope exercises
Start on a nearly flat green run. Set your pizza wedge and consciously vary the pressure: brake hard, brake softly, brake hard. This trains your feel for the pressure required. You can then practice traversing: ride diagonally to the left, stop, ride diagonally to the right, stop. This teaches you to combine braking with steering.
Another effective exercise is to deliberately ski more slowly than you could. Beginners often want to get down the hill as fast as possible. Force yourself to go slowly and maintain that speed consistently using the pizza wedge. This develops the fine motor control needed for the technique.
Off-slope strength exercises
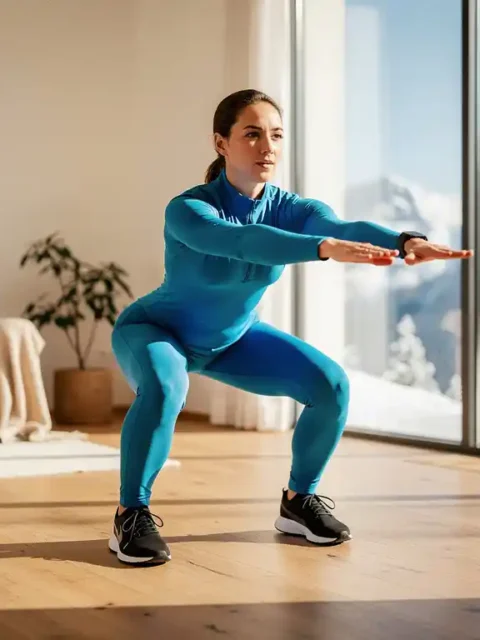
The pizza wedge requires strength in the inner thighs and the stabilizing muscles around the knee. At home or in the gym, you can train these with:
- Sumo squats: A wide squat stance that targets the inner thighs.
- Wall sit: Sit with your back against the wall at a 90-degree angle and hold the position. This simulates the skiing stance.
- Lateral steps with a resistance band: This strengthens the hip abductors, which you need for stability.
The stronger your legs, the longer you can hold the pizza wedge without getting tired.
When do you move on from the pizza wedge to another braking technique?
You move on from the pizza wedge to another braking technique once you’re comfortable on green and easy blue runs and you notice that the snowplow no longer keeps your speed sufficiently under control. At that point, it’s time to learn parallel turns, where you brake by steering rather than by friction.
The pizza wedge is a learning technique, not a permanent braking style. Experienced skiers don’t brake with a wedge — they keep their skis parallel and make targeted turns. The transition from the pizza wedge to parallel turns goes through an intermediate step called the wedge turn or stem turn: you begin the turn in the wedge position and bring the skis together halfway through the turn. This gives you more control and less fatigue.
Signs that you’re ready for the next step:
- You can consistently control your speed on green runs.
- You feel comfortable and relaxed on your skis.
- Your pizza wedge feels “too narrow” on faster slopes.
- You notice that you’re automatically making turns instead of just braking.
Don’t try to force the transition. Every skier progresses at their own pace, and that’s completely normal. A good instructor will know exactly when you’re ready for the next technique.
How Ski-Pro helps you progress faster on the slopes
Learning the pizza wedge and then advancing to parallel turns happens much faster with the right guidance. That’s exactly what we at Ski-Pro are here for. We connect you with more than 250 certified ski schools and instructors throughout the Alps, so you don’t have to spend endless time searching — you can just go skiing.
Here’s what we offer for beginners:
- Compare group lessons and private lessons side by side on price, location, and reviews.
- Choose your destination, from a first weekend getaway to a full beginner course in Tyrol.
- Book easily online, with no hassle or hidden prices.
- Find lessons at your level, tailored specifically to complete beginners.
Whether you’re stepping onto skis for the very first time or want to turn your pizza wedge into real parallel turns: compare and book your ski lesson through Ski-Pro and hit the slopes fully prepared.
Frequently Asked Questions
How long does it typically take a beginner to master the pizza wedge?
Most beginners pick up the basic pizza wedge movement on their very first day of skiing, but truly feeling in control — including modulating braking pressure — takes an average of two to three days of active practice on green runs. This varies from person to person and depends heavily on your overall fitness, leg strength, and how relaxed you are on your skis. Having a certified instructor by your side speeds up this process considerably compared to figuring it out on your own.
Does the type of skis I use as a beginner matter for the pizza wedge?
Yes, the type of ski definitely matters. Shorter, wider beginner skis are far more forgiving and respond better to the pizza wedge technique than long, narrow skis. Rental skis at ski resorts are generally already set up for beginner-level use, so if you’re renting, you’ll usually be fine. Always ask the rental shop explicitly for skis that match your ability level, so the technique can work as effectively as possible.
Is it normal for my legs to tire out so quickly when braking with the pizza wedge?
Absolutely — that’s completely normal and virtually every beginner experiences it. The pizza wedge requires constant isometric pressure from the inner thigh muscles, a muscle group that rarely gets worked this way in everyday life. As you ski more and optionally do targeted strength exercises such as sumo squats and wall sits, the fatigue will decrease quickly. In the meantime, take regular short breaks on the slope so that your technique doesn’t deteriorate due to exhaustion.