
How do you use video analysis to improve your skiing technique?
Video analysis helps you improve your skiing technique by making movements visible on screen that you cannot feel yourself. What your body thinks it is doing and what it is actually doing often differ significantly. With video, you can see exactly where your weight is, how your arms are moving, and whether your turns are symmetrical. In this article, we answer the most frequently asked questions about video analysis on the slopes.
What does video analysis reveal that a ski instructor does not always see?
Video analysis captures details that even the most experienced ski instructor can miss in real time. An instructor stands beside or behind you, has only a few seconds per turn cycle to observe, and must simultaneously keep an eye on safety. A camera records everything: the exact position of your knees, the angle of your torso, the timing of your pole plant, and how your weight shifts from ski to ski.
What makes video especially valuable is the ability to slow footage down. A turn cycle at average speed might last just two seconds. In slow motion, you can suddenly see whether your hip is collapsing inward, whether your outside ski is weighted too early or too late, or whether your shoulders are rotating when they should be staying stable. These are subtle errors that are nearly invisible in real time but become crystal clear on video.
Video also gives you an objective point of reference. Feel is subjective: many skiers think they are bending deeply through their knees, while video shows that the angle is much smaller than expected. That gap between perception and reality is precisely why video analysis is such a powerful learning tool.
How does video analysis work during a ski lesson?
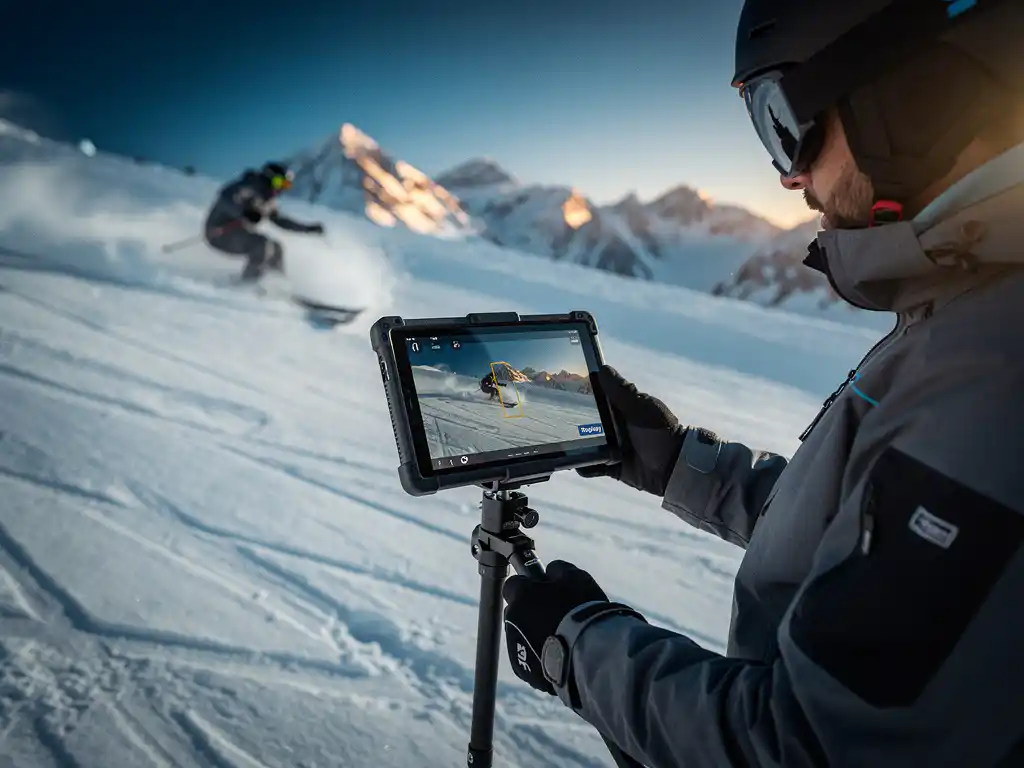
During a ski lesson with video analysis, the instructor films you as you ski down a section of the slope, after which you review and discuss the footage together. This can happen directly on the slope via a smartphone or tablet, or later in a warm indoor space. The combination of skiing, filming, and analyzing creates a feedback loop that significantly accelerates your learning process.
A typical session looks like this:
- Warm-up and first run: You ski a section while the instructor films, ideally from multiple angles — such as from the front, from behind, and from the side.
- Joint analysis: You review the footage together. The instructor points out specific moments and explains what is happening technically.
- Targeted practice: You return to the slope with one or two concrete areas for improvement in mind.
- Comparison run: After practicing, you are filmed again so you can see the difference.
This cyclical process makes video analysis far more effective than purely verbal feedback. You see for yourself what is changing, which makes the correction tangible and memorable.
Which apps and tools are used for video analysis on the slopes?
There are various apps and tools available for video analysis on the slopes that you can use directly on your smartphone. The most widely used options are Hudl Technique, Coach’s Eye, and the built-in slow-motion camera on iPhones and Android devices. These tools are easy to use, perform well in cold weather, and deliver more than enough image quality for technical analysis.
Apps for ski analysis
Hudl Technique is popular among sports coaches and instructors because it allows you to easily add annotations and drawings directly onto the footage. You can draw lines along your torso or knees to make angles visible. Coach’s Eye offers similar features and lets you place two video clips side by side — ideal for comparing a “before and after.” For beginners, the slow-motion mode of a standard camera app is often sufficient: 120 or 240 frames per second provides enough detail to analyze turns frame by frame.
Hardware and mounting
A tripod or a clamp mount for a pole on the slope makes filming more stable. Action cameras like a GoPro are useful for a moving perspective, but for technical analysis a fixed camera filming you from the side or front is far more informative. Some ski schools use professional video systems that automatically capture multiple angles, but for most skiers a smartphone on a tripod is more than enough.
What are the most common skiing technique errors that video reveals?
The most common skiing technique errors that video analysis exposes are an overly upright posture, knees collapsing inward, an asymmetrical turning style, and a pole plant that comes too late or too early. These errors often do not feel wrong to the skier, but they are immediately visible on video.
Here are the errors that appear most frequently in both beginner and advanced skiers:
- Too little forward pressure: Many skiers unconsciously lean back, causing the ski tips to rise and reducing control.
- Knees collapsing inward: This is known as “knocking” and leads to a loss of edge angle and stability through the turn.
- Shoulders rotating with the skis: The torso should remain stable and facing down the fall line. When the shoulders rotate with the skis, you lose balance and rhythmic turn flow.
- Asymmetry between left and right: Almost everyone has a dominant side. Video makes it clear that one turning direction is smoother than the other.
- Absent or poor pole plant: The pole plant initiates the transition between turns. If it is missing or comes too late, you lose rhythm and timing.
The great thing about video is that you do not have to take your instructor’s word for these errors. You see them yourself, which greatly increases your motivation to correct them.
How do you apply video feedback to improve faster?
The most effective way to apply video feedback is to choose a maximum of two concrete areas for improvement after each analysis session and practice them deliberately before being filmed again. Trying to address more than two points at once leads to overthinking, which actually disrupts your movement. Focus and repetition are the keys.
A few practical tips to get the most out of your video feedback:
- Write it down: After each analysis discussion, note in your own words what you are going to change. This helps you remember it while skiing.
- Use mental imagery: Watch the footage several times and visualize what the corrected movement looks like. Mental training reinforces motor learning.
- Practice on easy terrain: Do not immediately take your new technique onto a challenging red or black run. Practice on a blue slope where you can focus without pressure.
- Film yourself again: After half an hour of practice, it is worthwhile to do a comparison run. This lets you see whether the correction has actually taken hold.
- Save your videos: A progress video spanning several days or weeks is enormously motivating and shows you how far you have already come.
Do ski schools in the Alps offer video analysis?
Yes, more and more ski schools in the Alps are offering video analysis as part of private lessons or as a standalone service. This is especially true of larger and more modern ski schools in popular destinations such as Tyrol, Salzburgerland, Verbier, and Chamonix. With private lessons, video analysis is more often included or easy to combine than with group lessons.
Availability varies by school and by instructor. Some schools use fixed video systems on the slope, while other instructors simply use their own smartphone. It is a good idea to explicitly ask when booking your ski lesson whether video analysis is available and whether any additional costs are involved.
How Ski-Pro helps you find the right ski lesson with video feedback
Looking for a ski school that offers video analysis and perfectly matches your level and destination? You have come to the right place. Through our platform, you can easily compare more than 250 certified ski schools and instructors in the Alps, from Tyrol to the French Alps and everything in between.
Here is what we take care of for you:
- Compare private and group lessons by price, quality, and availability
- Filter by your ski destination and level, from complete beginner to advanced skier
- Find instructors who use modern teaching methods, including video analysis
- Book directly online, quickly and without any hassle
No endless searching, no doubts about quality. Just more time on the slopes, with the right guidance to truly improve your skiing technique. Compare and book your ski lesson and head to the mountain fully prepared.
Frequently Asked Questions
Do I need special equipment to apply video analysis myself?
No, a modern smartphone is more than enough to get started with video analysis. Apps like Hudl Technique or Coach's Eye are free or inexpensive to download and work perfectly well in cold weather on the slopes. Ask a fellow skier or your instructor to film you from a fixed position on the side or front of the slope for the most informative footage.
How often should I use video analysis during a ski week to make real progress?
For noticeable improvement, it is ideal to film yourself at least once a day, preferably at the beginning and end of each session. This lets you see right away whether the morning's practice has paid off. Combine this with a maximum of two concrete areas for improvement per session, so you stay focused and do not overthink your technique.
Is video analysis useful for beginners, or is it only suitable for advanced skiers?
Video analysis is actually enormously valuable for beginners too, precisely because they have not yet formed a conscious picture of their own movements. Seeing your own posture at an early stage prevents you from cementing bad habits that become harder to correct later on. For beginners, it is advisable to carry out the analysis under the guidance of an instructor, so that the footage is interpreted correctly.
What if I do not have a ski instructor — can I use video analysis on my own?
Yes, you can use video analysis independently by comparing your footage with reference clips of correct skiing technique, for example via YouTube or online ski instruction platforms. Keep it simple: focus on one or two visible aspects, such as your knee angle or torso position, to avoid overwhelming yourself with details. For more in-depth corrections, guidance from a certified instructor remains the most effective approach.